This post is created in partnership with Home Depot.
Things are going well with the build of our ‘Scandi Barn’ home addition out at the beach house. The structure is all framed out and we’re now just waiting on the collar tie beams that will pull the two sides together.

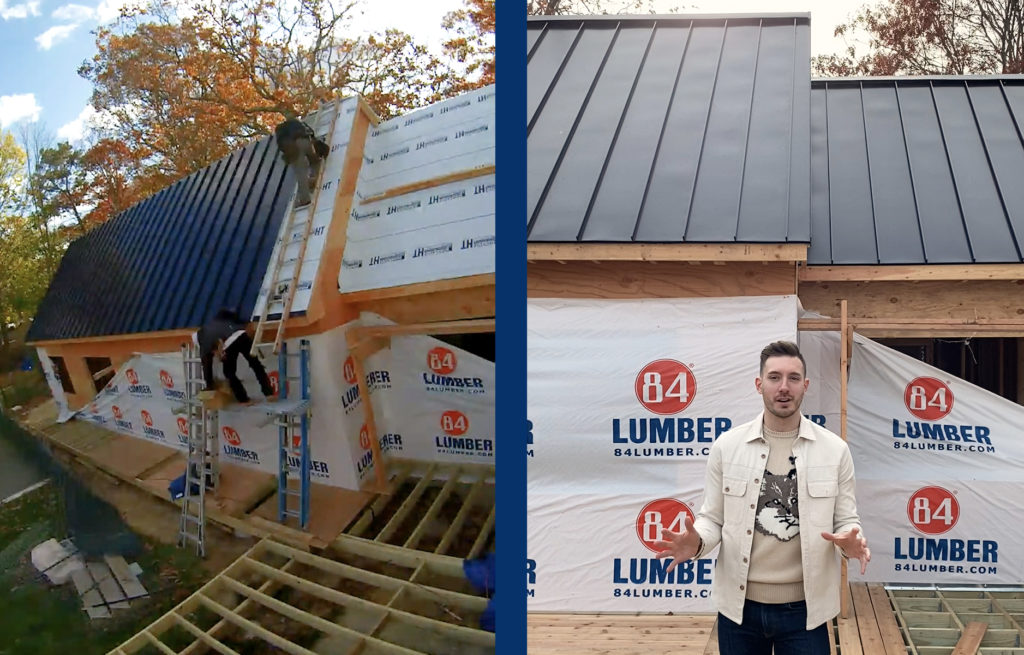
One of the biggest recent developments was that the roof was installed. It was a big relief to see it finally going on as the roof ended up being a bit of a sourcing issue for us. We loved the look of a metal roof but the costs were beyond prohibitive for our budget. Generally, in the New York area, the most common type of roofs are made using asphalt shingles; this is what we have on the existing house. Asphalt roofs are affordable but the drawback is that they aren’t so energy efficient as the shingles heat up a lot in the summer and they retain that heat for a long time. Also asphalt shingles aren’t very durable and need to be replaced every 5-10 years.
From a design angle I was always keen to have a metal roof because of the modern aesthetic it would create, contrasting to the main house in the process. Metal roofs have a lot of great benefits, too: they tend to be much more energy efficient vs. asphalt as they reflect the heat and they last lifetime with very little maintenance. Check out my IGTV episode here here to see the roof going on.
The next thing that is happening at the house is planning out all the electrical work. This is tough, as I learned during our initial refurbishment of the house! This is because if you make a mistake now it is expensive to correct once you have dry walled. So I needed to think carefully about the placement of all the electrical wiring in the addition, including power, tv cables, lighting and smart tech. Here are five things that I learned:
1. Plan furniture placement before you start wiring
One of the most important things to do as you plan for wiring is to decide where your furniture will be. This is important as it will dictate where you will need power and lighting. One thing I do is use a computer or online planning tool — a simple program like Room Sketch is great, but there are plenty others. This will help you place your furniture and from there you can decide where you will need power points, such as next to beds, side tables etc.
The other useful thing to do is use some brown construction paper to cut and measure out your furniture so that you can play around with the sizes and position ‘live’ in the space itself. When it’s all laid out you can then walk between objects, such as coffee table and sofas, and determine if there is enough space for your choices. When you know where furniture will be you can think about good places for overhead lights and power sockets.
2. Plan smart tech
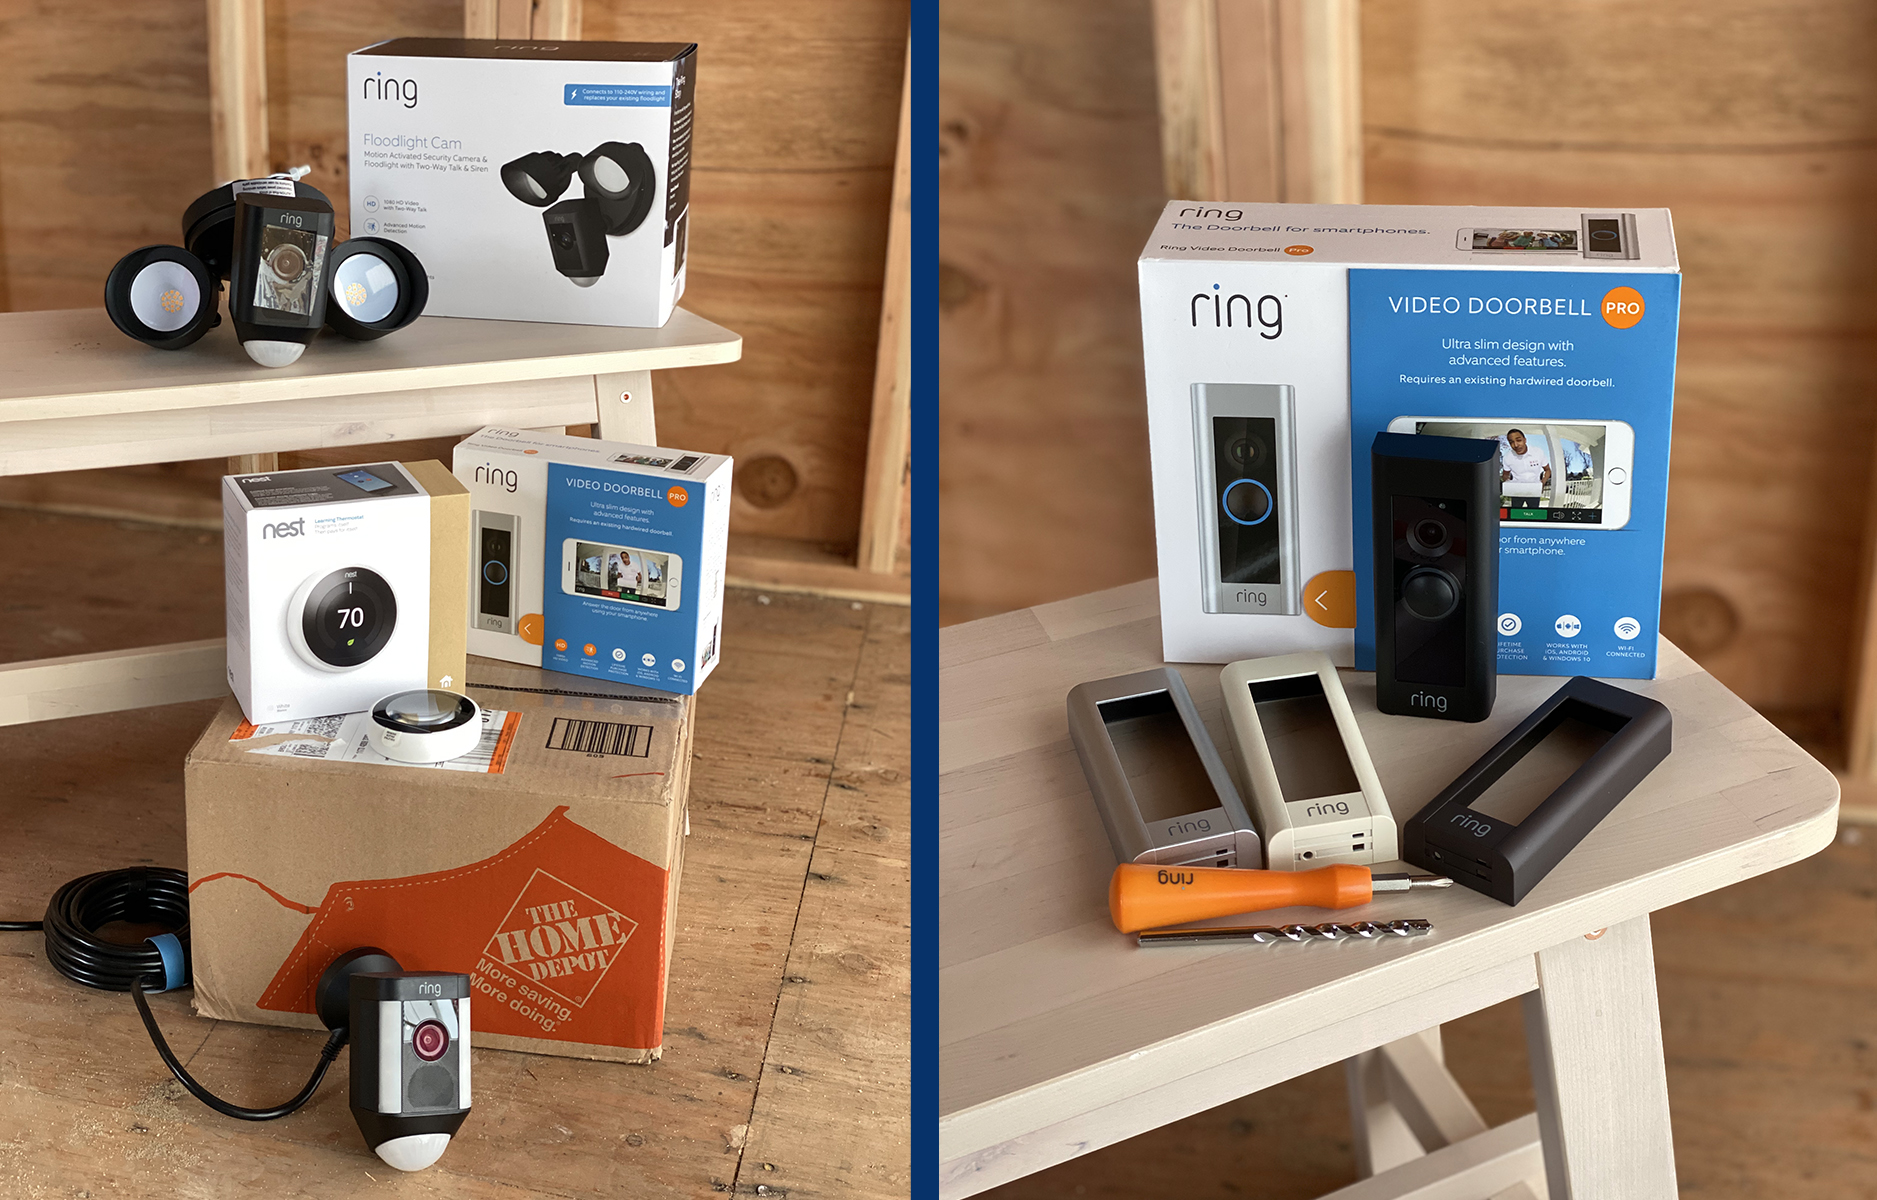
I also learned that planning your smart tech from the beginning is so much easier than doing it later on. Many smart home devices are hard-wired so having them in the correct place before you dry wall makes things a lot easier. Here is the home tech I decided on for our home addition:
– Ring Video Doorbell Pro
I choose the Ring Doorbell because it’s really useful to have one of these for a second home as you can let people know remotely that you are out. The reason I choose the pro version was that you get to choose different color covers for the device. We are going with a dark siding for the addition so we wanted a device that would blend in. Most video doorbells don’t offer different color choices so when I saw this I was sold!
– Ring Flood Light Camera Black
With the new addition it has a created a new section of the garden that runs from the end of the driveway all along the side of the garden. We are going to use this area to access the garden but it also means that it is an ideal place for a potential thief to enter. What I thought was great about the Flood Light Camera was that it came in black so it will blend into the siding and not be an eyesore. It also combines an alarm with the camera and a motion sensor light, too. Now, instead of having to all these different devices which would look cluttered and unsightly we have everything in one device. Plus, I get alerts on the app if it spots any unusual activity and I can easily share with neighbors in the area if I want to.
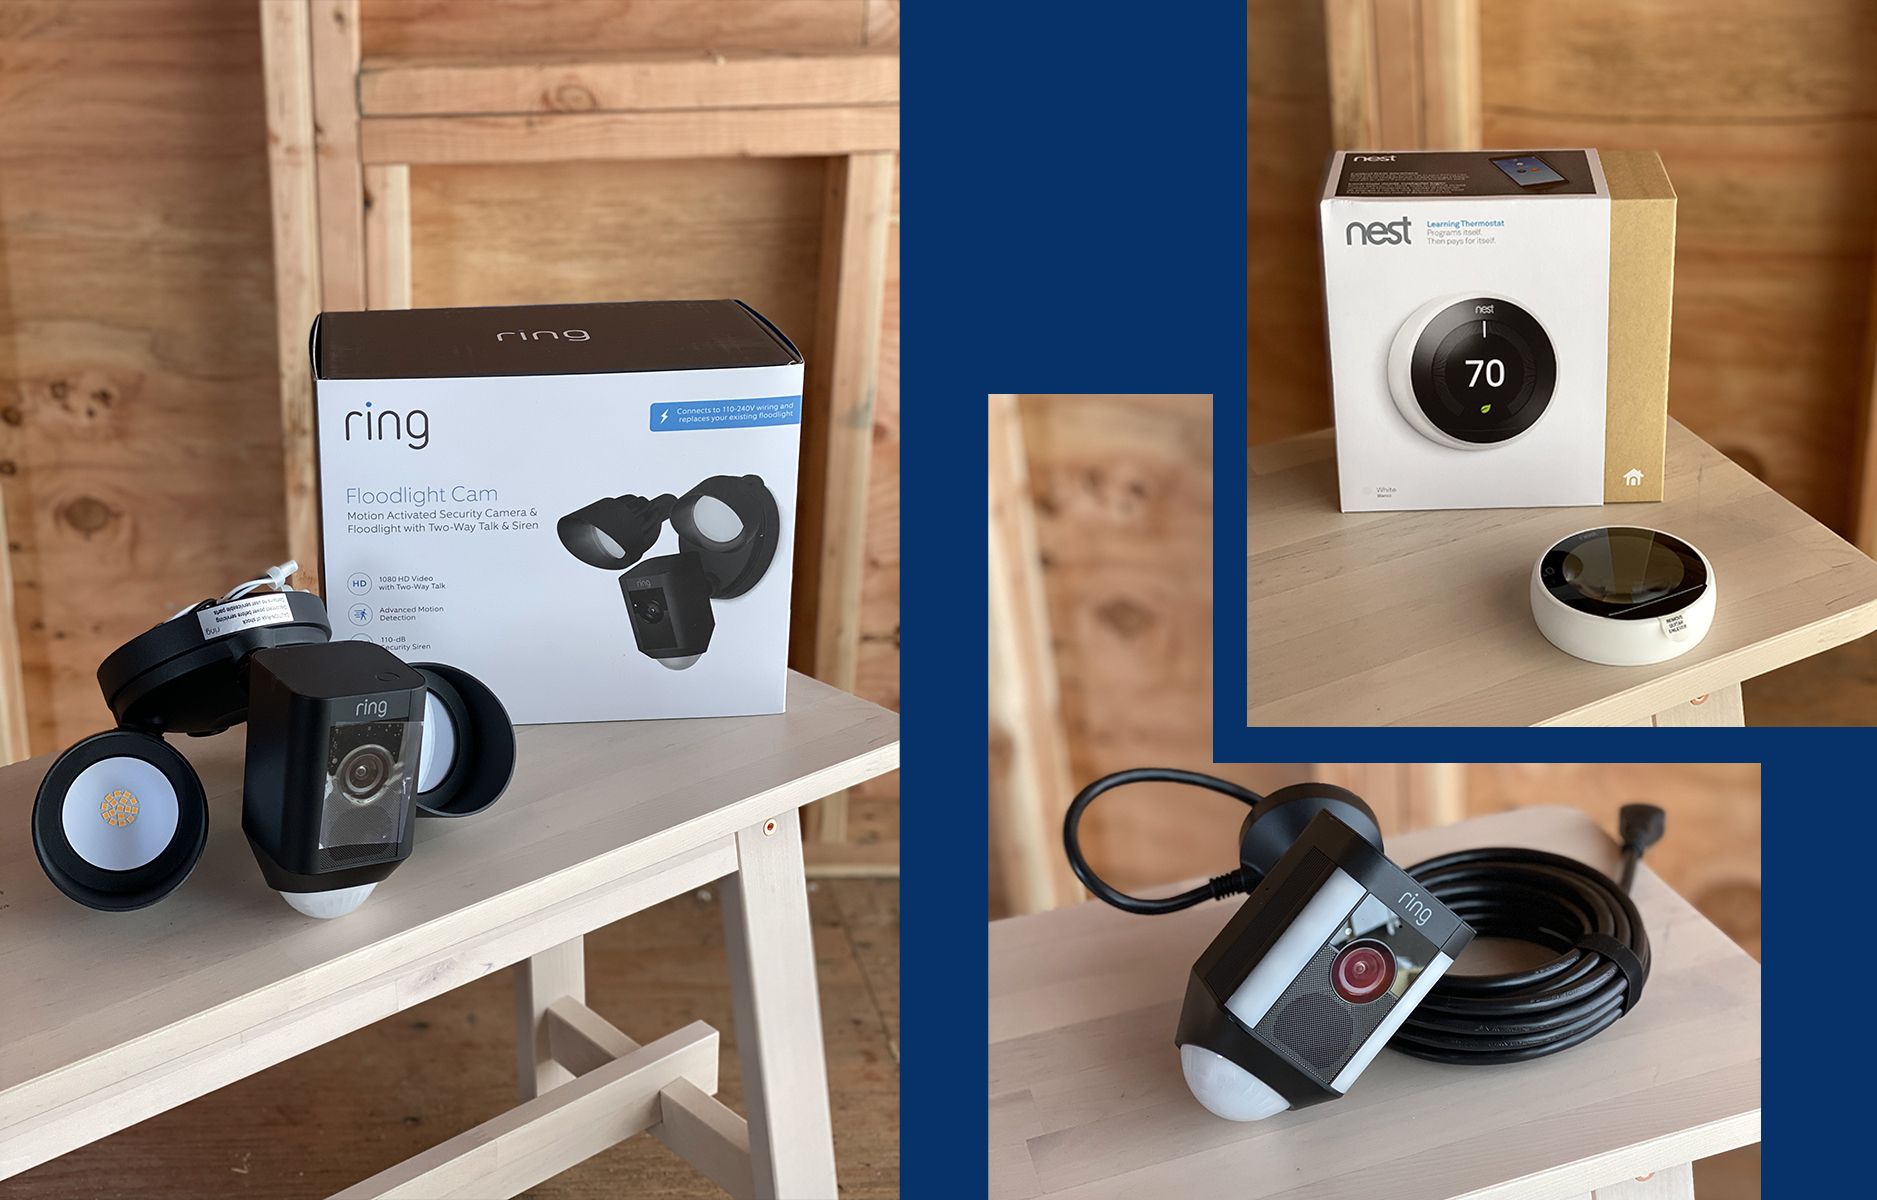
– Ring Spot Light Cam Black
The new addition means we will finally get a front porch where will be able to take off shoes and boots without getting rained on! The other great thing is that we will be able to have our packages dropped off here. With that last point in mind we wanted a camera that would watch over any left packages. You hear of so many problems with people having packages stolen so this plug in camera should be a good deterrent. There’s also a a motion sensor light so it will be perfect when we are trying to get the key in the door after dark.
– Smart Thermostat – Nest Learning Thermostat White
The final piece of tech we decided on was a Nest thermostat. I love the Nest system as it’s so easy to use, plus the thermostat ‘learns’ — it saves you money by learning your routine and knowing when people are and are not at home, and then adjusting the heat or A/C accordingly. I choose this device as I wanted something that, again, would blend in and not stand out. Thermostats can often be big ugly boxes that sit on the wall so I really like how slim this device is. Plus, it has a simple white surround so will blend right into the wall. There are no buttons and you control the device by spinning the surround which is simple and easy to use.
3. Walk the space
Once you have decided on the placement of your furniture and your smart tech make sure you walk the space, and think about how will you walk to bed at night or how do you get to the thermostat etc. These types of everyday routines will help you decide where you will need two or three way light switches. The last thing you want to do is carry a drink upstairs to bed and there is no light switch to turn the lights on or off once you get up there.
By walking the space once it is framed, especially thinking about which way doors open, will also help you decide where to put light switches and sockets. The kitchen or wet bar areas are important to consider too — think about where you would like appliances like coffee makers to plug in and to make sure a socket is there for them.
4. Don’t forget about the drapes
Curtains and drapes can be really helpful in hiding some sockets. Often you need a socket placed when you don’t really need it (thanks building codes!), or you need one just to plug a vacuum into, for example. However, having all these sockets can distract the eye from the overall room design, so think where your drapes are going to be as often they can be helpful in hiding these additional sockets.
5. Floor sockets
My last top tip is don’t forget about floor sockets; when you are doing a home addition it’s the perfect time to add them. These can be really useful under a dining table or sofa so that you can charge a laptop or other device without needing to have wires all across the room. Often an electrician will not offer these without prompting but they aren’t hard to put in. Plus, many come with brass or black plates so they don’t ugly, especially when covered by a dining table, rug or sofa.



5 Comments
Fabulous Post..Keep sharing it
Wow, such an amazing post.
Good Post..its Looking Fantastic..keep posting it
Hi Will! Thank you so much for these helpful tips. You discuss well and detailed on how you guys install the smart techs. Installing and working well is to get it right. Overall even you feel exhausted when you see the results its worth it.
Thanks for sharing, I looks so beautiful.